Введение в быстрое использование ImGui под Windows для создания проектов (VS, DX11)
Чтение инструкций
Эта статья основана на использовании ImGui на основе API под DX11. Я не пробовал другие графические API, поэтому обратитесь к другим материалам, связанным с API, которые могут оказаться неприменимыми.
Введение в ImGui:
Дорогой ImGui — это библиотека графического пользовательского интерфейса (GUI) без сохранения состояния, разработанная для C++, целью которой является предоставление быстрого и удобного способа создания инструментов создания контента и инструментов визуализации/отладки, а не проектирования пользовательского интерфейса для конечных пользователей. Он широко используется в таких сценариях, как игровые движки, 3D-приложения реального времени, полноэкранные приложения, встроенные приложения или консольные платформы с нестандартными функциями операционной системы. Особенности Dear ImGui включают независимость от системы рендеринга и платформы, не требующую специального процесса сборки, а просто добавление основных файлов в проект. Он также обеспечивает множественную поддержку серверной части для интеграции с различными графическими API и платформами рендеринга.
Дорогой ImGui очень интуитивно понятен в использовании. Например, вы можете легко вызывать его функции в цикле программы для создания таких элементов, как текст, кнопки, поля ввода и ползунки. Он также позволяет создавать собственные окна, в том числе окна со строками меню, отображать содержимое в областях прокрутки и многое другое. Дорогой, философия дизайна ImGui заключается в содействии быстрой итерации и повышении производительности разработчиков, поэтому в ней отсутствуют некоторые функции, обычно встречающиеся в более продвинутых библиотеках, но это одна из причин, почему она подходит в качестве инструмента быстрого прототипирования и отладки.
Дорогой ImGui имеет активное сообщество с обширной документацией и учебными пособиями для справки.
В целом, Dear ImGui — это мощная и гибкая библиотека графического интерфейса, подходящая для сценариев, требующих быстрой разработки и тестирования, таких как разработка игр, разработка 3D-приложений в реальном времени и т. д. Его простота и удобство использования позволяют разработчикам быстро приступить к работе и воспользоваться его функциями для повышения эффективности разработки.
Скачать ImGui
Перейдите по ссылке на github:
https://github.com/ocornut/imgui
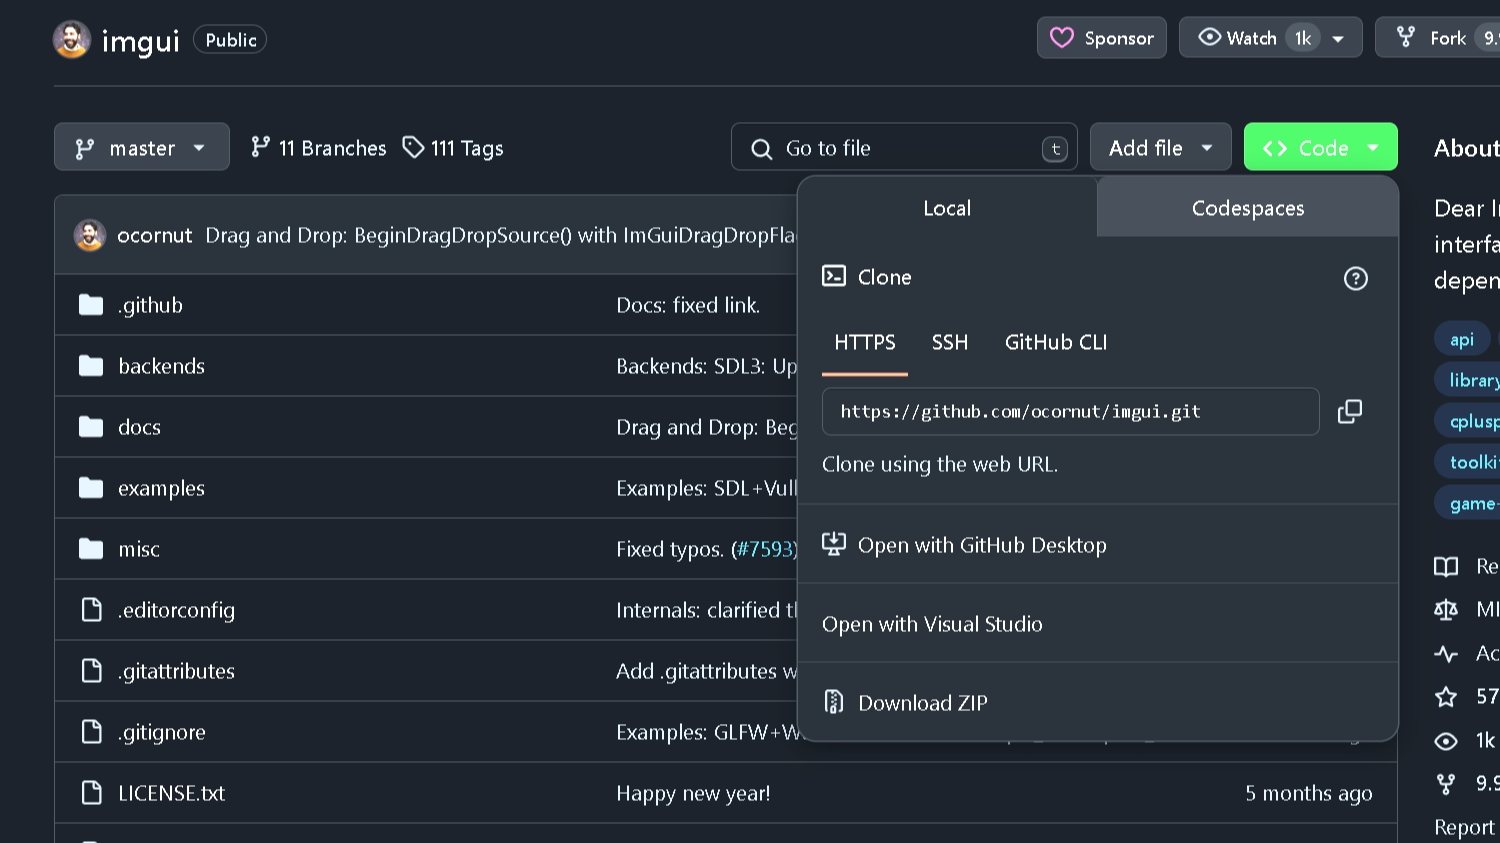
Скачиваем сжатый пакет и распаковываем его в любую директорию любым способом. Короче говоря, мы получаем папку ImGui.
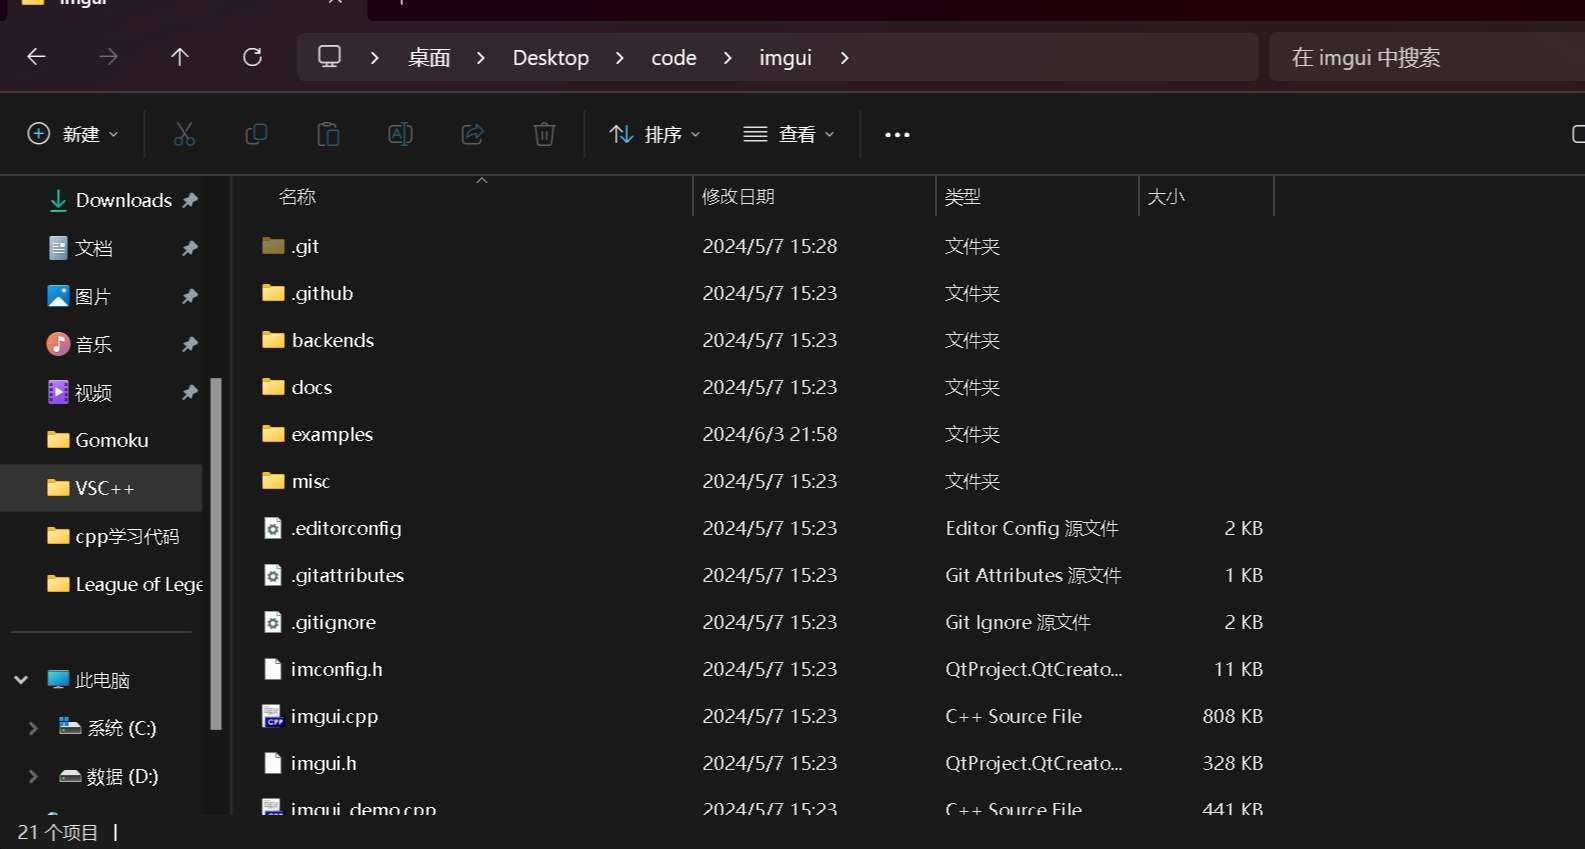
Откройте папку примеров внутри
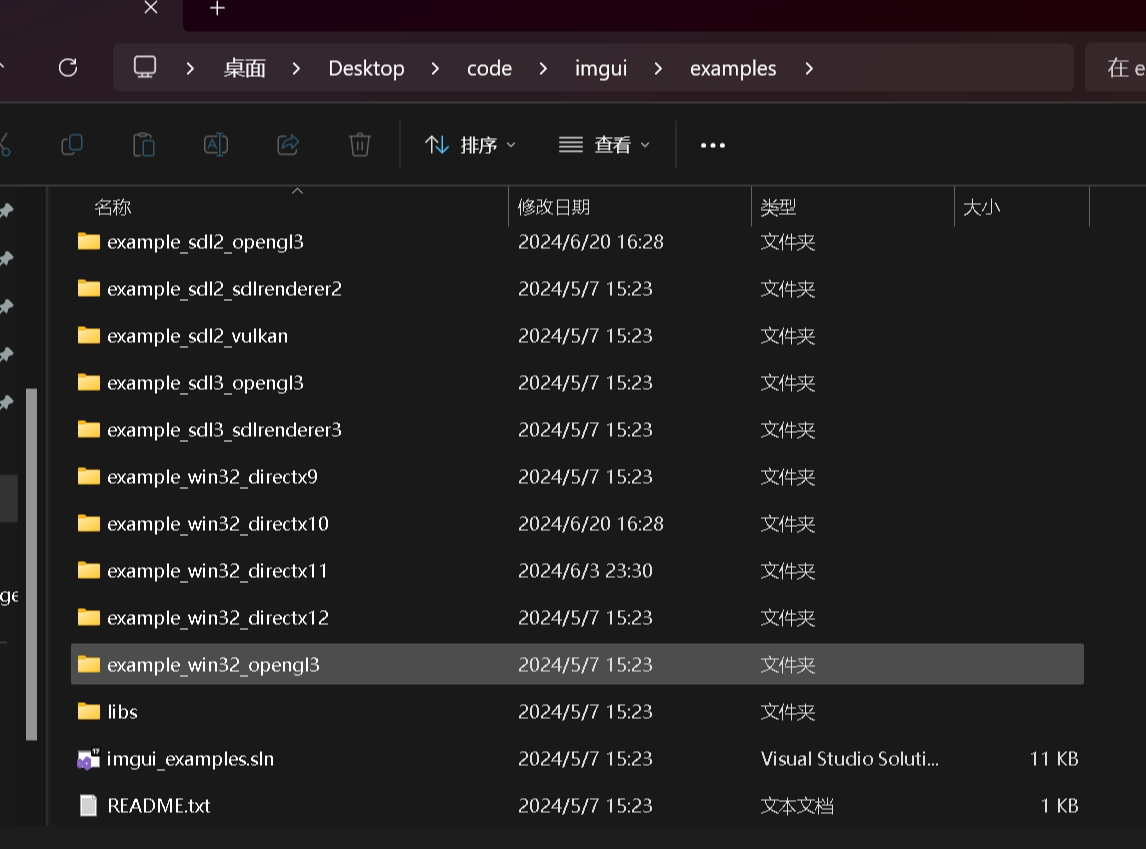
Запустите Imgui_examples.sln
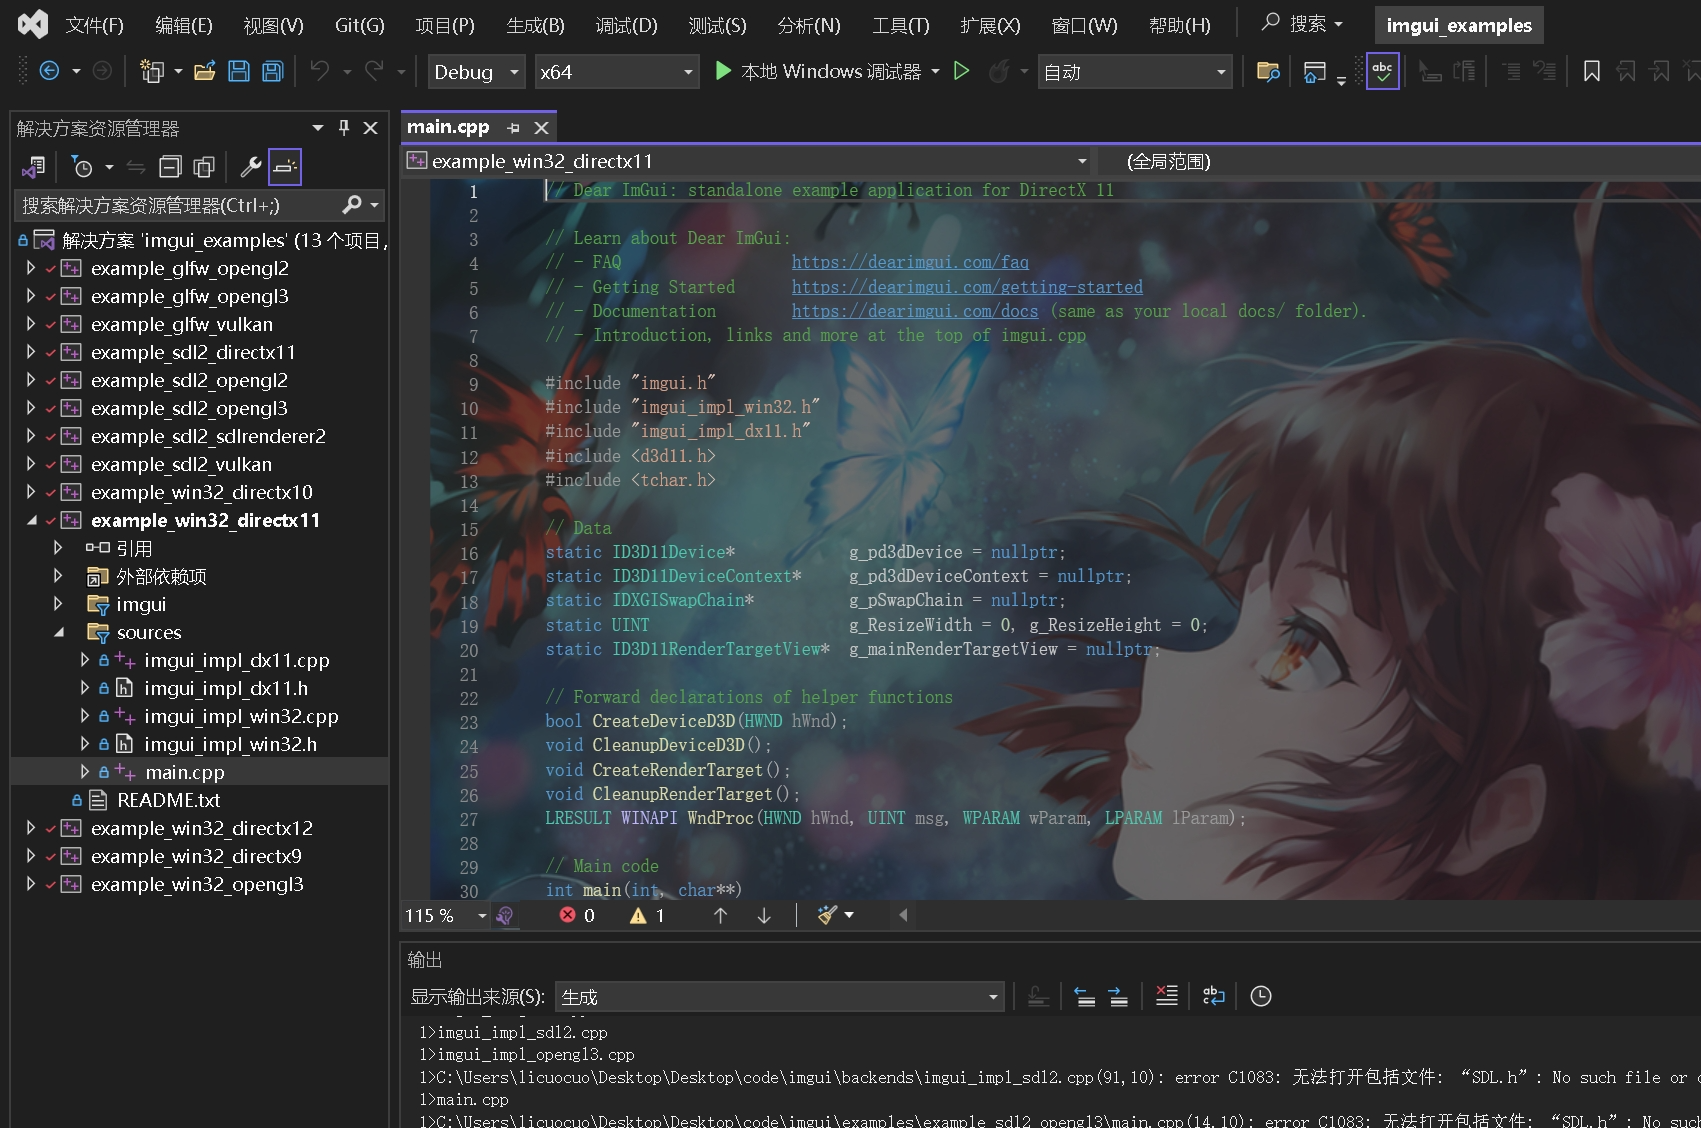
Настройте вариант использования, связанный с интересующим вас графическим API, в качестве стартового проекта и запустите основной файл, чтобы фактически объявить, что ваш вариант использования ImGui работает.
Но этого недостаточно, наша цель — внедрить его в проекты, требующие Imgui.
Простое знакомство с ImGui
Создайте новый пустой проект с помощью VS.
Создайте новую папку ImGui в пустом каталоге проекта.
Вернитесь в корневой каталог папки imgui, загруженной с github.
для удобства
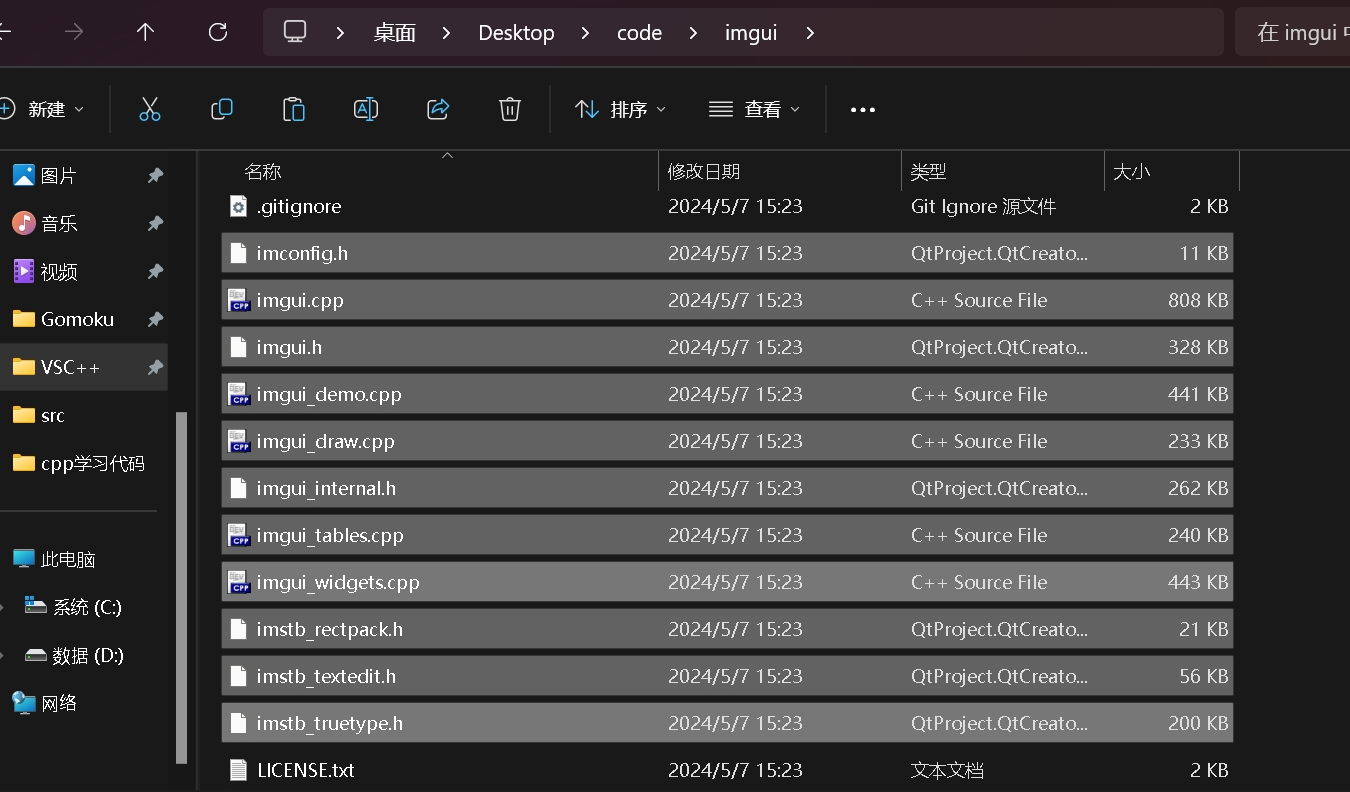
Скопируйте все выбранные файлы в папку ImGui в новом пустом проекте.
Откройте папку backends в папке imgui.
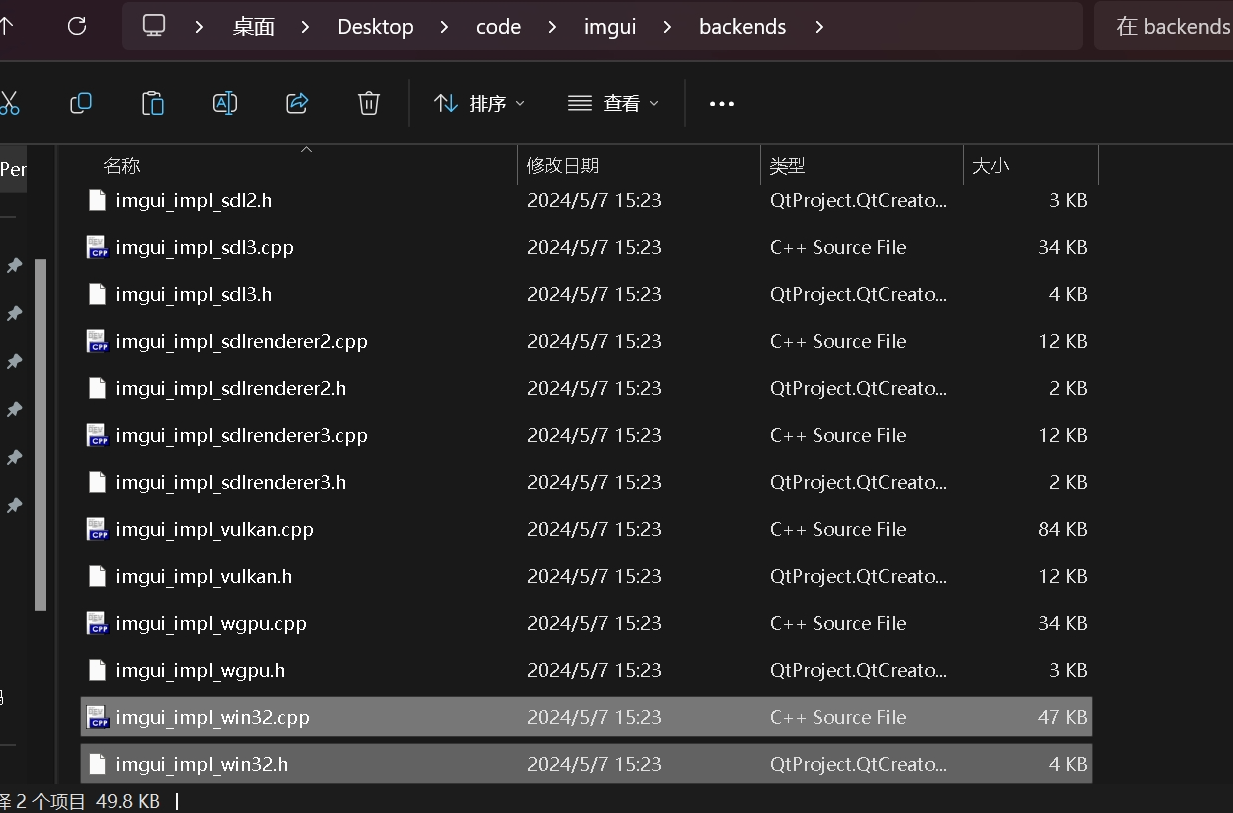
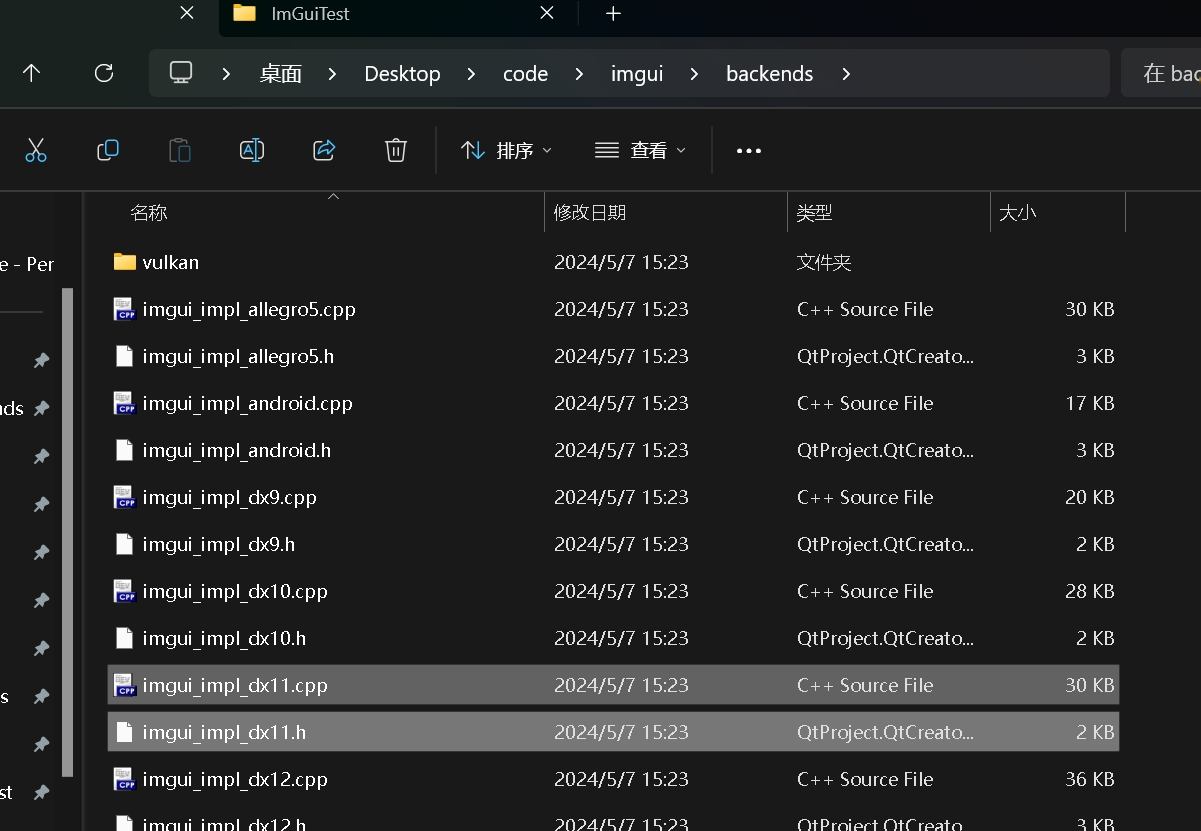
imgui_impl_dx11.cpp,imgui_impl_dx11.h,imgui_impl_win32.cpp,imgui_impl_win32.h
Скопируйте выбранные файлы в папку ImGui во вновь созданном пустом каталоге.
PS: Если вам нужно, чтобы ImGui отображался в другой среде графического API, скопируйте соответствующий файл заголовка графического API и файл cpp.
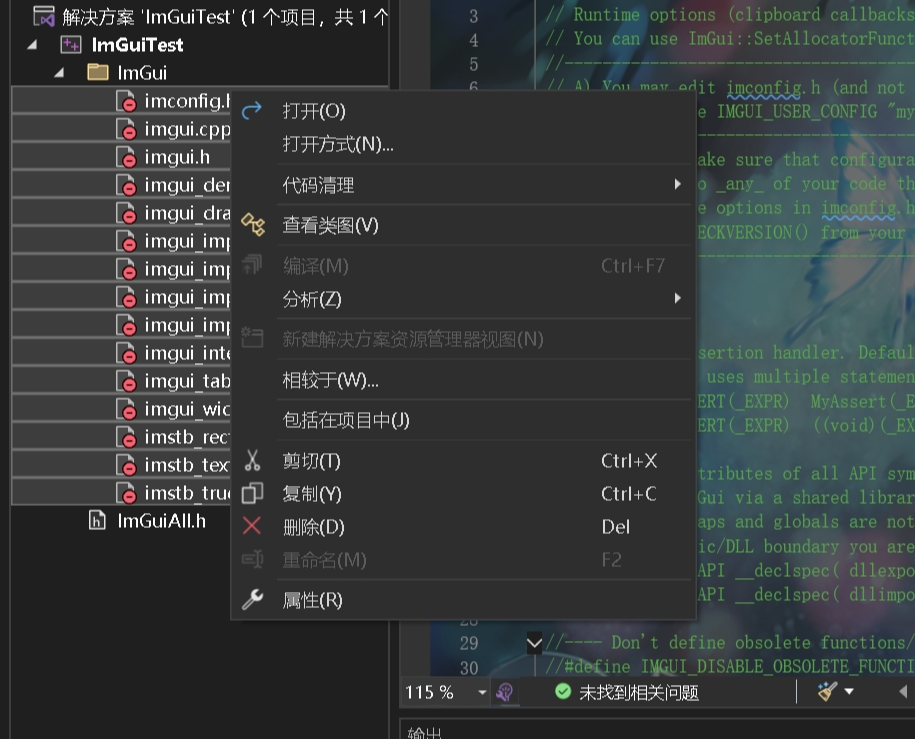
Необходимые документы представлены на рисунке:
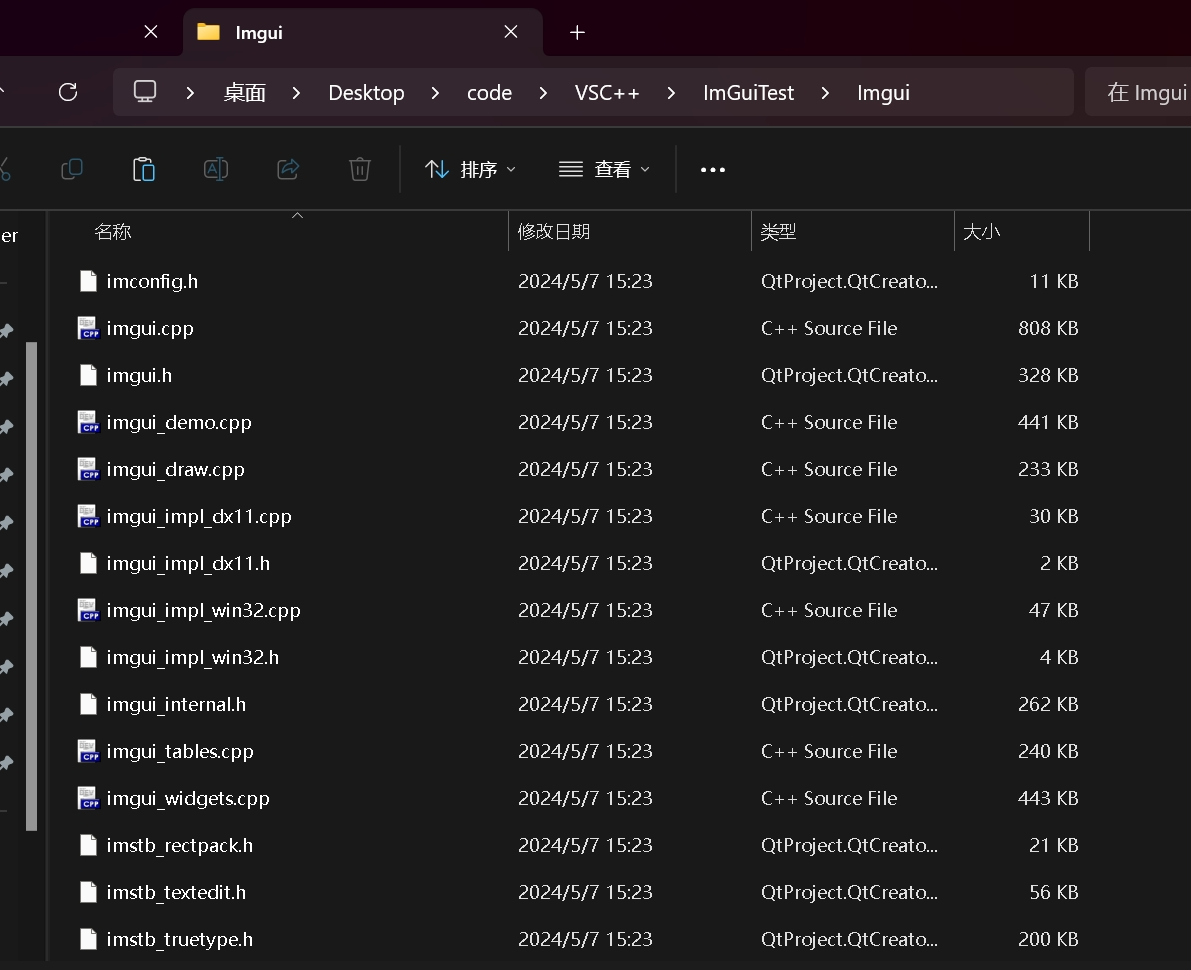
Вы можете удалить некоторые файлы для экономии места в соответствии с вашими потребностями, но рекомендуется не трогать их при использовании для удобства.
Откройте пустой проект, чтобы включить его в проект.
Создайте новый заголовочный файл ImGuiAll.h.
ImGuiAll.h
#pragma once
#include "ImGui/imconfig.h"
#include "ImGui/imgui.h"
#include "ImGui/imgui_impl_dx11.h"
#include "ImGui/imgui_impl_win32.h"
#include "ImGui/imgui_internal.h"
#include "ImGui/imstb_rectpack.h"
#include "ImGui/imstb_textedit.h"
#include "ImGui/imstb_truetype.h"

#include <d3d11.h>

#pragma comment(lib,"d3d11.lib")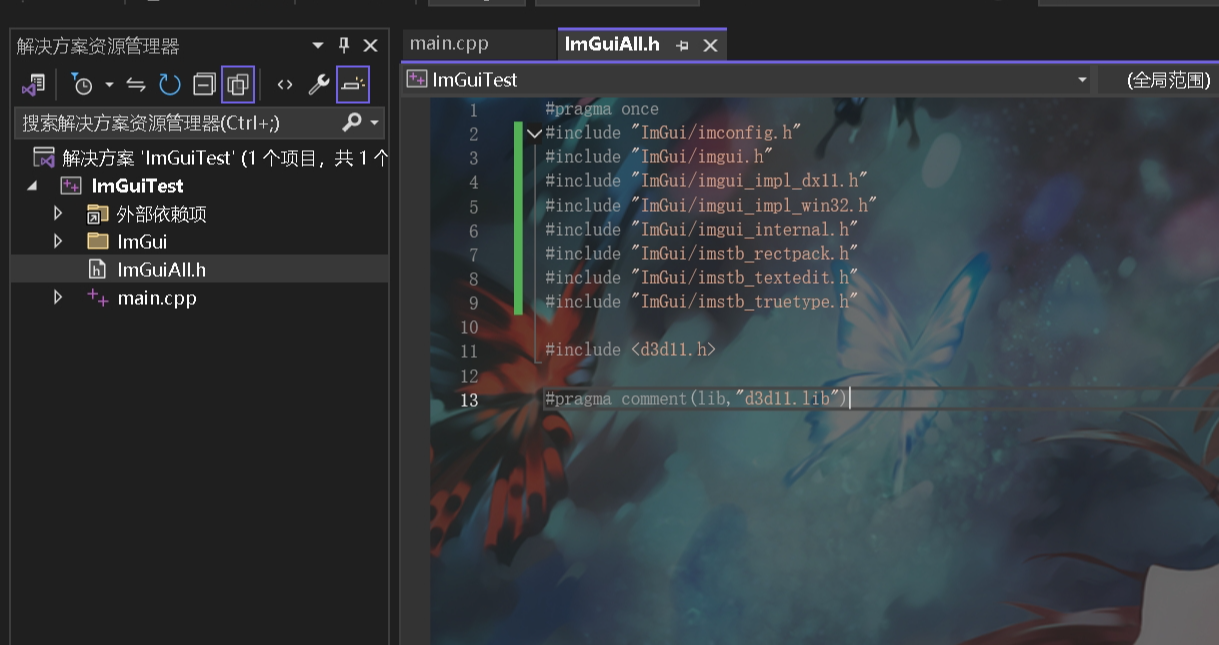
Создайте новый основной файл для демонстрации.
Если вы просто учитесь использовать для удобства, вы можете открыть ранее скачанный на github.
imgui\examples\example_sdl2_directx11
Скопируйте код main.cpp в основной файл для демонстрации.
Изменить часть кода
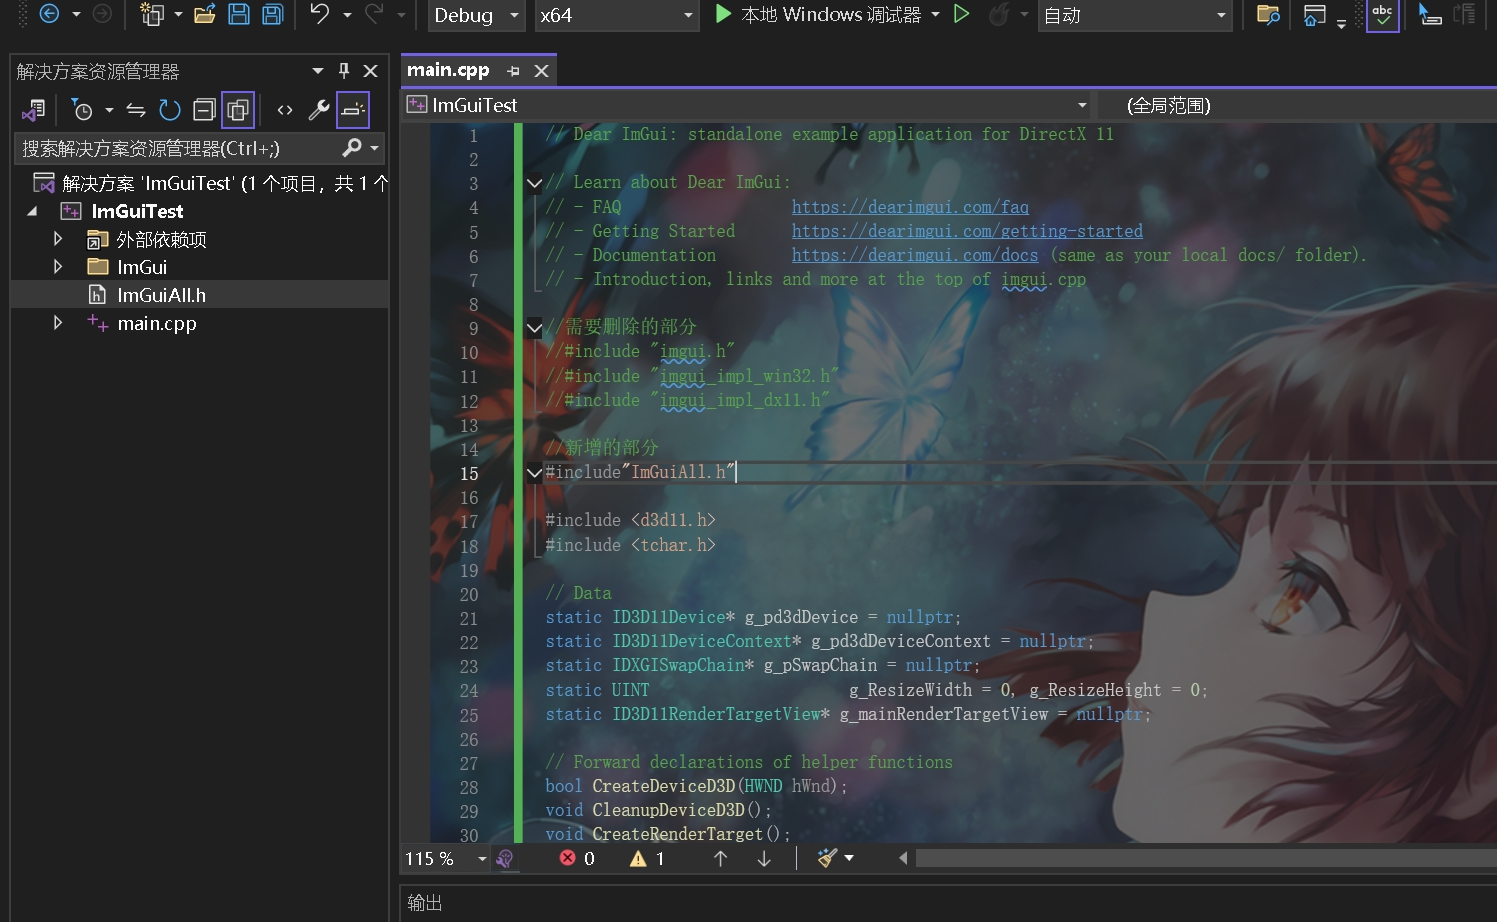
main.cpp
// Dear ImGui: standalone example application for DirectX 11

// Learn about Dear ImGui:
// - FAQ                  https://dearimgui.com/faq
// - Getting Started      https://dearimgui.com/getting-started
// - Documentation        https://dearimgui.com/docs (same as your local docs/ folder).
// - Introduction, links and more at the top of imgui.cpp

// #include "imgui.h"
// #include "imgui_impl_win32.h"
// #include "imgui_impl_dx11.h"
#include"ImGuiAll.h"
#include <d3d11.h>
#include <tchar.h>

// Data
static ID3D11Device*            g_pd3dDevice = nullptr;
static ID3D11DeviceContext*     g_pd3dDeviceContext = nullptr;
static IDXGISwapChain*          g_pSwapChain = nullptr;
static UINT                     g_ResizeWidth = 0, g_ResizeHeight = 0;
static ID3D11RenderTargetView*  g_mainRenderTargetView = nullptr;

// Forward declarations of helper functions
bool CreateDeviceD3D(HWND hWnd);
void CleanupDeviceD3D();
void CreateRenderTarget();
void CleanupRenderTarget();
LRESULT WINAPI WndProc(HWND hWnd, UINT msg, WPARAM wParam, LPARAM lParam);

// Main code
int main(int, char**)
{
    // Create application window
    //ImGui_ImplWin32_EnableDpiAwareness();
    WNDCLASSEXW wc = { sizeof(wc), CS_CLASSDC, WndProc, 0L, 0L, GetModuleHandle(nullptr), nullptr, nullptr, nullptr, nullptr, L"ImGui Example", nullptr };
    ::RegisterClassExW(&wc);
    HWND hwnd = ::CreateWindowW(wc.lpszClassName, L"Dear ImGui DirectX11 Example", WS_OVERLAPPEDWINDOW, 100, 100, 1280, 800, nullptr, nullptr, wc.hInstance, nullptr);

    // Initialize Direct3D
    if (!CreateDeviceD3D(hwnd))
    {
        CleanupDeviceD3D();
        ::UnregisterClassW(wc.lpszClassName, wc.hInstance);
        return 1;
    }

    // Show the window
    ::ShowWindow(hwnd, SW_SHOWDEFAULT);
    ::UpdateWindow(hwnd);

    // Setup Dear ImGui context
    IMGUI_CHECKVERSION();
    ImGui::CreateContext();
    ImGuiIO& io = ImGui::GetIO(); (void)io;
    io.ConfigFlags |= ImGuiConfigFlags_NavEnableKeyboard;     // Enable Keyboard Controls
    io.ConfigFlags |= ImGuiConfigFlags_NavEnableGamepad;      // Enable Gamepad Controls

    // Setup Dear ImGui style
    ImGui::StyleColorsDark();
    //ImGui::StyleColorsLight();

    // Setup Platform/Renderer backends
    ImGui_ImplWin32_Init(hwnd);
    ImGui_ImplDX11_Init(g_pd3dDevice, g_pd3dDeviceContext);

    // Load Fonts
    // - If no fonts are loaded, dear imgui will use the default font. You can also load multiple fonts and use ImGui::PushFont()/PopFont() to select them.
    // - AddFontFromFileTTF() will return the ImFont* so you can store it if you need to select the font among multiple.
    // - If the file cannot be loaded, the function will return a nullptr. Please handle those errors in your application (e.g. use an assertion, or display an error and quit).
    // - The fonts will be rasterized at a given size (w/ oversampling) and stored into a texture when calling ImFontAtlas::Build()/GetTexDataAsXXXX(), which ImGui_ImplXXXX_NewFrame below will call.
    // - Use '#define IMGUI_ENABLE_FREETYPE' in your imconfig file to use Freetype for higher quality font rendering.
    // - Read 'docs/FONTS.md' for more instructions and details.
    // - Remember that in C/C++ if you want to include a backslash \ in a string literal you need to write a double backslash \\ !
    //io.Fonts->AddFontDefault();
    //io.Fonts->AddFontFromFileTTF("c:\\Windows\\Fonts\\segoeui.ttf", 18.0f);
    //io.Fonts->AddFontFromFileTTF("../../misc/fonts/DroidSans.ttf", 16.0f);
    //io.Fonts->AddFontFromFileTTF("../../misc/fonts/Roboto-Medium.ttf", 16.0f);
    //io.Fonts->AddFontFromFileTTF("../../misc/fonts/Cousine-Regular.ttf", 15.0f);
    //ImFont* font = io.Fonts->AddFontFromFileTTF("c:\\Windows\\Fonts\\ArialUni.ttf", 18.0f, nullptr, io.Fonts->GetGlyphRangesJapanese());
    //IM_ASSERT(font != nullptr);

    // Our state
    bool show_demo_window = true;
    bool show_another_window = false;
    ImVec4 clear_color = ImVec4(0.45f, 0.55f, 0.60f, 1.00f);

    // Main loop
    bool done = false;
    while (!done)
    {
        // Poll and handle messages (inputs, window resize, etc.)
        // See the WndProc() function below for our to dispatch events to the Win32 backend.
        MSG msg;
        while (::PeekMessage(&msg, nullptr, 0U, 0U, PM_REMOVE))
        {
            ::TranslateMessage(&msg);
            ::DispatchMessage(&msg);
            if (msg.message == WM_QUIT)
                done = true;
        }
        if (done)
            break;

        // Handle window resize (we don't resize directly in the WM_SIZE handler)
        if (g_ResizeWidth != 0 && g_ResizeHeight != 0)
        {
            CleanupRenderTarget();
            g_pSwapChain->ResizeBuffers(0, g_ResizeWidth, g_ResizeHeight, DXGI_FORMAT_UNKNOWN, 0);
            g_ResizeWidth = g_ResizeHeight = 0;
            CreateRenderTarget();
        }

        // Start the Dear ImGui frame
        ImGui_ImplDX11_NewFrame();
        ImGui_ImplWin32_NewFrame();
        ImGui::NewFrame();

        // 1. Show the big demo window (Most of the sample code is in ImGui::ShowDemoWindow()! You can browse its code to learn more about Dear ImGui!).
        if (show_demo_window)
            ImGui::ShowDemoWindow(&show_demo_window);

        // 2. Show a simple window that we create ourselves. We use a Begin/End pair to create a named window.
        {
            static float f = 0.0f;
            static int counter = 0;

            ImGui::Begin("Hello, world!");                          // Create a window called "Hello, world!" and append into it.

            ImGui::Text("This is some useful text.");               // Display some text (you can use a format strings too)
            ImGui::Checkbox("Demo Window", &show_demo_window);      // Edit bools storing our window open/close state
            ImGui::Checkbox("Another Window", &show_another_window);

            ImGui::SliderFloat("float", &f, 0.0f, 1.0f);            // Edit 1 float using a slider from 0.0f to 1.0f
            ImGui::ColorEdit3("clear color", (float*)&clear_color); // Edit 3 floats representing a color

            if (ImGui::Button("Button"))                            // Buttons return true when clicked (most widgets return true when edited/activated)
                counter++;
            ImGui::SameLine();
            ImGui::Text("counter = %d", counter);

            ImGui::Text("Application average %.3f ms/frame (%.1f FPS)", 1000.0f / io.Framerate, io.Framerate);
            ImGui::End();
        }

        // 3. Show another simple window.
        if (show_another_window)
        {
            ImGui::Begin("Another Window", &show_another_window);   // Pass a pointer to our bool variable (the window will have a closing button that will clear the bool when clicked)
            ImGui::Text("Hello from another window!");
            if (ImGui::Button("Close Me"))
                show_another_window = false;
            ImGui::End();
        }

        // Rendering
        ImGui::Render();
        const float clear_color_with_alpha[4] = { clear_color.x * clear_color.w, clear_color.y * clear_color.w, clear_color.z * clear_color.w, clear_color.w };
        g_pd3dDeviceContext->OMSetRenderTargets(1, &g_mainRenderTargetView, nullptr);
        g_pd3dDeviceContext->ClearRenderTargetView(g_mainRenderTargetView, clear_color_with_alpha);
        ImGui_ImplDX11_RenderDrawData(ImGui::GetDrawData());

        g_pSwapChain->Present(1, 0); // Present with vsync
        //g_pSwapChain->Present(0, 0); // Present without vsync
    }

    // Cleanup
    ImGui_ImplDX11_Shutdown();
    ImGui_ImplWin32_Shutdown();
    ImGui::DestroyContext();

    CleanupDeviceD3D();
    ::DestroyWindow(hwnd);
    ::UnregisterClassW(wc.lpszClassName, wc.hInstance);

    return 0;
}

// Helper functions

bool CreateDeviceD3D(HWND hWnd)
{
    // Setup swap chain
    DXGI_SWAP_CHAIN_DESC sd;
    ZeroMemory(&sd, sizeof(sd));
    sd.BufferCount = 2;
    sd.BufferDesc.Width = 0;
    sd.BufferDesc.Height = 0;
    sd.BufferDesc.Format = DXGI_FORMAT_R8G8B8A8_UNORM;
    sd.BufferDesc.RefreshRate.Numerator = 60;
    sd.BufferDesc.RefreshRate.Denominator = 1;
    sd.Flags = DXGI_SWAP_CHAIN_FLAG_ALLOW_MODE_SWITCH;
    sd.BufferUsage = DXGI_USAGE_RENDER_TARGET_OUTPUT;
    sd.OutputWindow = hWnd;
    sd.SampleDesc.Count = 1;
    sd.SampleDesc.Quality = 0;
    sd.Windowed = TRUE;
    sd.SwapEffect = DXGI_SWAP_EFFECT_DISCARD;

    UINT createDeviceFlags = 0;
    //createDeviceFlags |= D3D11_CREATE_DEVICE_DEBUG;
    D3D_FEATURE_LEVEL featureLevel;
    const D3D_FEATURE_LEVEL featureLevelArray[2] = { D3D_FEATURE_LEVEL_11_0, D3D_FEATURE_LEVEL_10_0, };
    HRESULT res = D3D11CreateDeviceAndSwapChain(nullptr, D3D_DRIVER_TYPE_HARDWARE, nullptr, createDeviceFlags, featureLevelArray, 2, D3D11_SDK_VERSION, &sd, &g_pSwapChain, &g_pd3dDevice, &featureLevel, &g_pd3dDeviceContext);
    if (res == DXGI_ERROR_UNSUPPORTED) // Try high-performance WARP software driver if hardware is not available.
        res = D3D11CreateDeviceAndSwapChain(nullptr, D3D_DRIVER_TYPE_WARP, nullptr, createDeviceFlags, featureLevelArray, 2, D3D11_SDK_VERSION, &sd, &g_pSwapChain, &g_pd3dDevice, &featureLevel, &g_pd3dDeviceContext);
    if (res != S_OK)
        return false;

    CreateRenderTarget();
    return true;
}

void CleanupDeviceD3D()
{
    CleanupRenderTarget();
    if (g_pSwapChain) { g_pSwapChain->Release(); g_pSwapChain = nullptr; }
    if (g_pd3dDeviceContext) { g_pd3dDeviceContext->Release(); g_pd3dDeviceContext = nullptr; }
    if (g_pd3dDevice) { g_pd3dDevice->Release(); g_pd3dDevice = nullptr; }
}

void CreateRenderTarget()
{
    ID3D11Texture2D* pBackBuffer;
    g_pSwapChain->GetBuffer(0, IID_PPV_ARGS(&pBackBuffer));
    g_pd3dDevice->CreateRenderTargetView(pBackBuffer, nullptr, &g_mainRenderTargetView);
    pBackBuffer->Release();
}

void CleanupRenderTarget()
{
    if (g_mainRenderTargetView) { g_mainRenderTargetView->Release(); g_mainRenderTargetView = nullptr; }
}

// Forward declare message handler from imgui_impl_win32.cpp
extern IMGUI_IMPL_API LRESULT ImGui_ImplWin32_WndProcHandler(HWND hWnd, UINT msg, WPARAM wParam, LPARAM lParam);

// Win32 message handler
// You can read the io.WantCaptureMouse, io.WantCaptureKeyboard flags to tell if dear imgui wants to use your inputs.
// - When io.WantCaptureMouse is true, do not dispatch mouse input data to your main application, or clear/overwrite your copy of the mouse data.
// - When io.WantCaptureKeyboard is true, do not dispatch keyboard input data to your main application, or clear/overwrite your copy of the keyboard data.
// Generally you may always pass all inputs to dear imgui, and hide them from your application based on those two flags.
LRESULT WINAPI WndProc(HWND hWnd, UINT msg, WPARAM wParam, LPARAM lParam)
{
    if (ImGui_ImplWin32_WndProcHandler(hWnd, msg, wParam, lParam))
        return true;

    switch (msg)
    {
    case WM_SIZE:
        if (wParam == SIZE_MINIMIZED)
            return 0;
        g_ResizeWidth = (UINT)LOWORD(lParam); // Queue resize
        g_ResizeHeight = (UINT)HIWORD(lParam);
        return 0;
    case WM_SYSCOMMAND:
        if ((wParam & 0xfff0) == SC_KEYMENU) // Disable ALT application menu
            return 0;
        break;
    case WM_DESTROY:
        ::PostQuitMessage(0);
        return 0;
    }
    return ::DefWindowProcW(hWnd, msg, wParam, lParam);
}
Скриншот запуска:
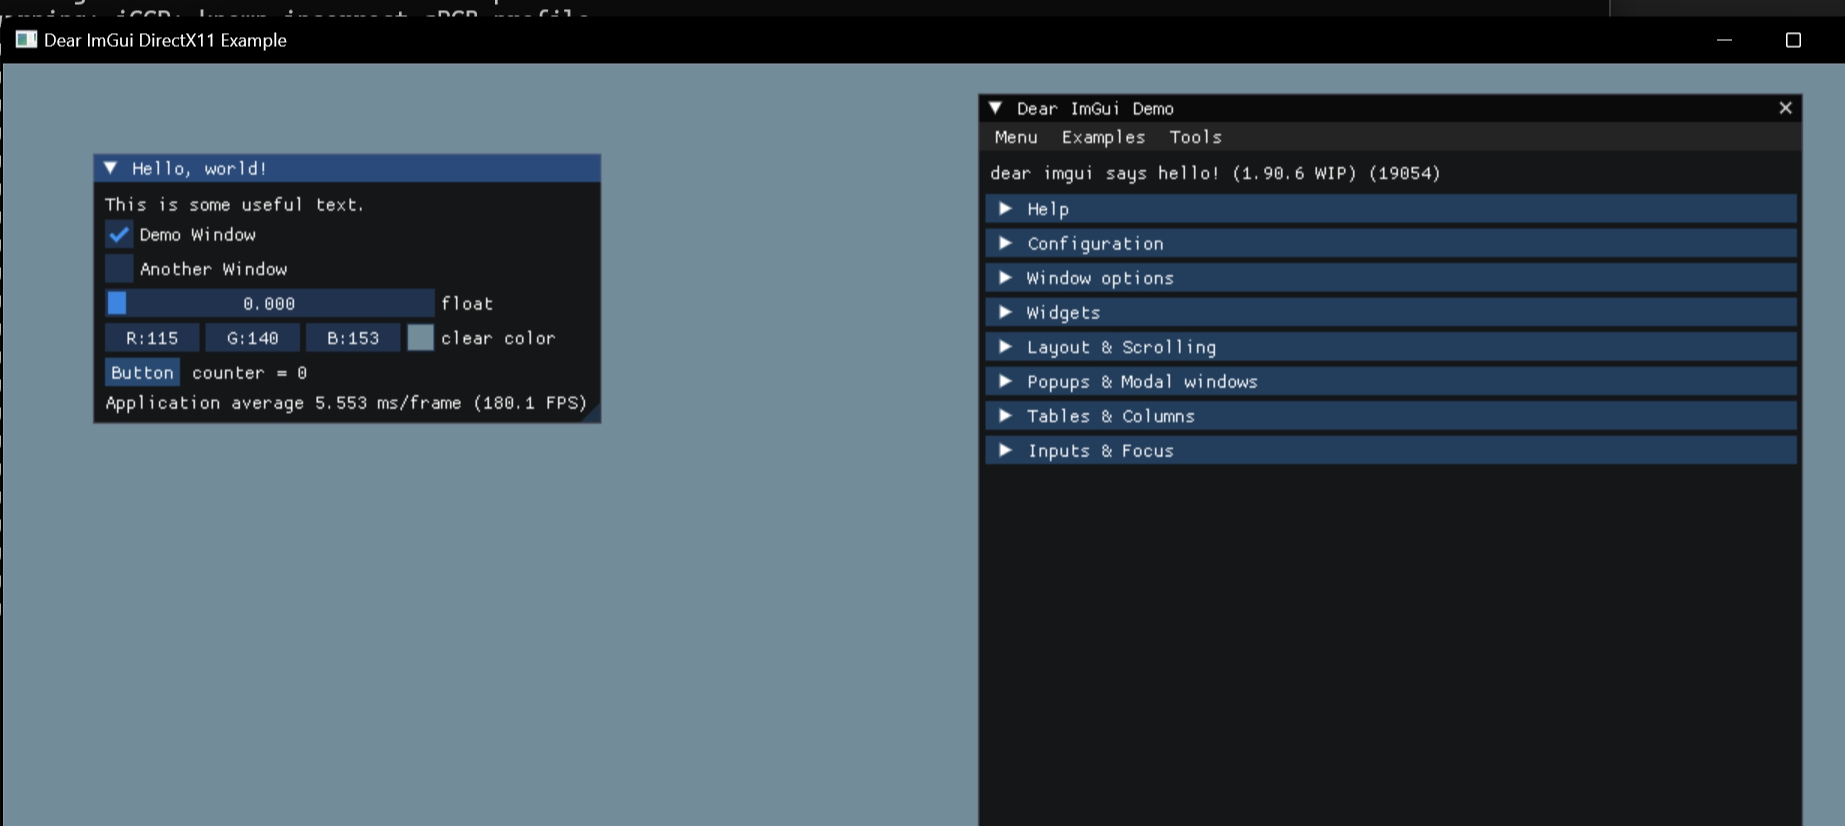
Если вы не хотите изучать связанные примеры, вы можете удалить лишний код рисования, как это сделал я.
main.cpp
    //Приведенный выше код опущен
    //Вы можете обратиться к приведенному выше обучающему примеру, чтобы следовать этому разделу кода
        // Start the Dear ImGui frame
        ImGui_ImplDX11_NewFrame();
        ImGui_ImplWin32_NewFrame();
        ImGui::NewFrame();
        //Это область, где рисуется код
        ImGui::Begin("test", &show_test);
        ImGui::Text("ddd");
        ImGui::End();
        // Rendering
        ImGui::Render();
        const float clear_color_with_alpha[4] = { clear_color.x * clear_color.w, clear_color.y * clear_color.w, clear_color.z * clear_color.w, clear_color.w };
        g_pd3dDeviceContext->OMSetRenderTargets(1, &g_mainRenderTargetView, nullptr);
        g_pd3dDeviceContext->ClearRenderTargetView(g_mainRenderTargetView, clear_color_with_alpha);
        ImGui_ImplDX11_RenderDrawData(ImGui::GetDrawData());

        g_pSwapChain->Present(1, 0); // Present with vsync
        //g_pSwapChain->Present(0, 0); // Present without vsync
    }

    // Cleanup
    ImGui_ImplDX11_Shutdown();
    ImGui_ImplWin32_Shutdown();
    ImGui::DestroyContext();

    CleanupDeviceD3D();
    ::DestroyWindow(hwnd);
    ::UnregisterClassW(wc.lpszClassName, wc.hInstance);

    //Следующий код опущен
    //Вы можете обратиться к приведенному выше обучающему примеру, чтобы следовать этому разделу кода
Скриншот запуска:
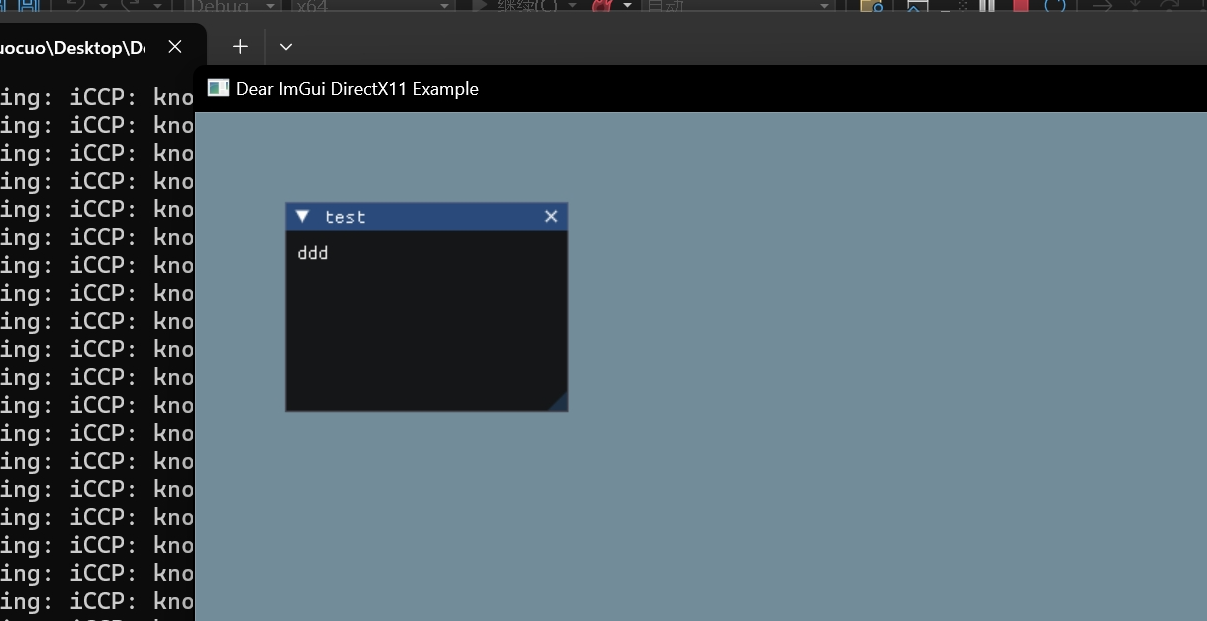
Что касается рендеринга API под glfw, vulkan и opengl3, я обновлю соответствующие методы использования в будущем.
В настоящее время, если это вышеуказанный API, эта статья предназначена только для справки. Я участвую в последнем конкурсе эссе для специального учебного лагеря Tencent Technology Creation 2024. Приходите и разделите со мной приз!

Углубленный анализ переполнения памяти CUDA: OutOfMemoryError: CUDA не хватает памяти. Попыталась выделить 3,21 Ги Б (GPU 0; всего 8,00 Ги Б).

[Решено] ошибка установки conda. Среда решения: не удалось выполнить первоначальное зависание. Повторная попытка с помощью файла (графическое руководство).
Прочитайте нейросетевую модель Трансформера в одной статье

.ART Теплые зимние предложения уже открыты

Сравнительная таблица описания кодов ошибок Amap

Уведомление о последних правилах Points Mall в декабре 2022 года.

Даже новички могут быстро приступить к работе с легким сервером приложений.
Взгляд на RSAC 2024|Защита конфиденциальности в эпоху больших моделей
Вы используете ИИ каждый день и до сих пор не знаете, как ИИ дает обратную связь? Одна статья для понимания реализации в коде Python общих функций потерь генеративных моделей + анализ принципов расчета.

Используйте (внутренний) почтовый ящик для образовательных учреждений, чтобы использовать Microsoft Family Bucket (1T дискового пространства на одном диске и версию Office 365 для образовательных учреждений)
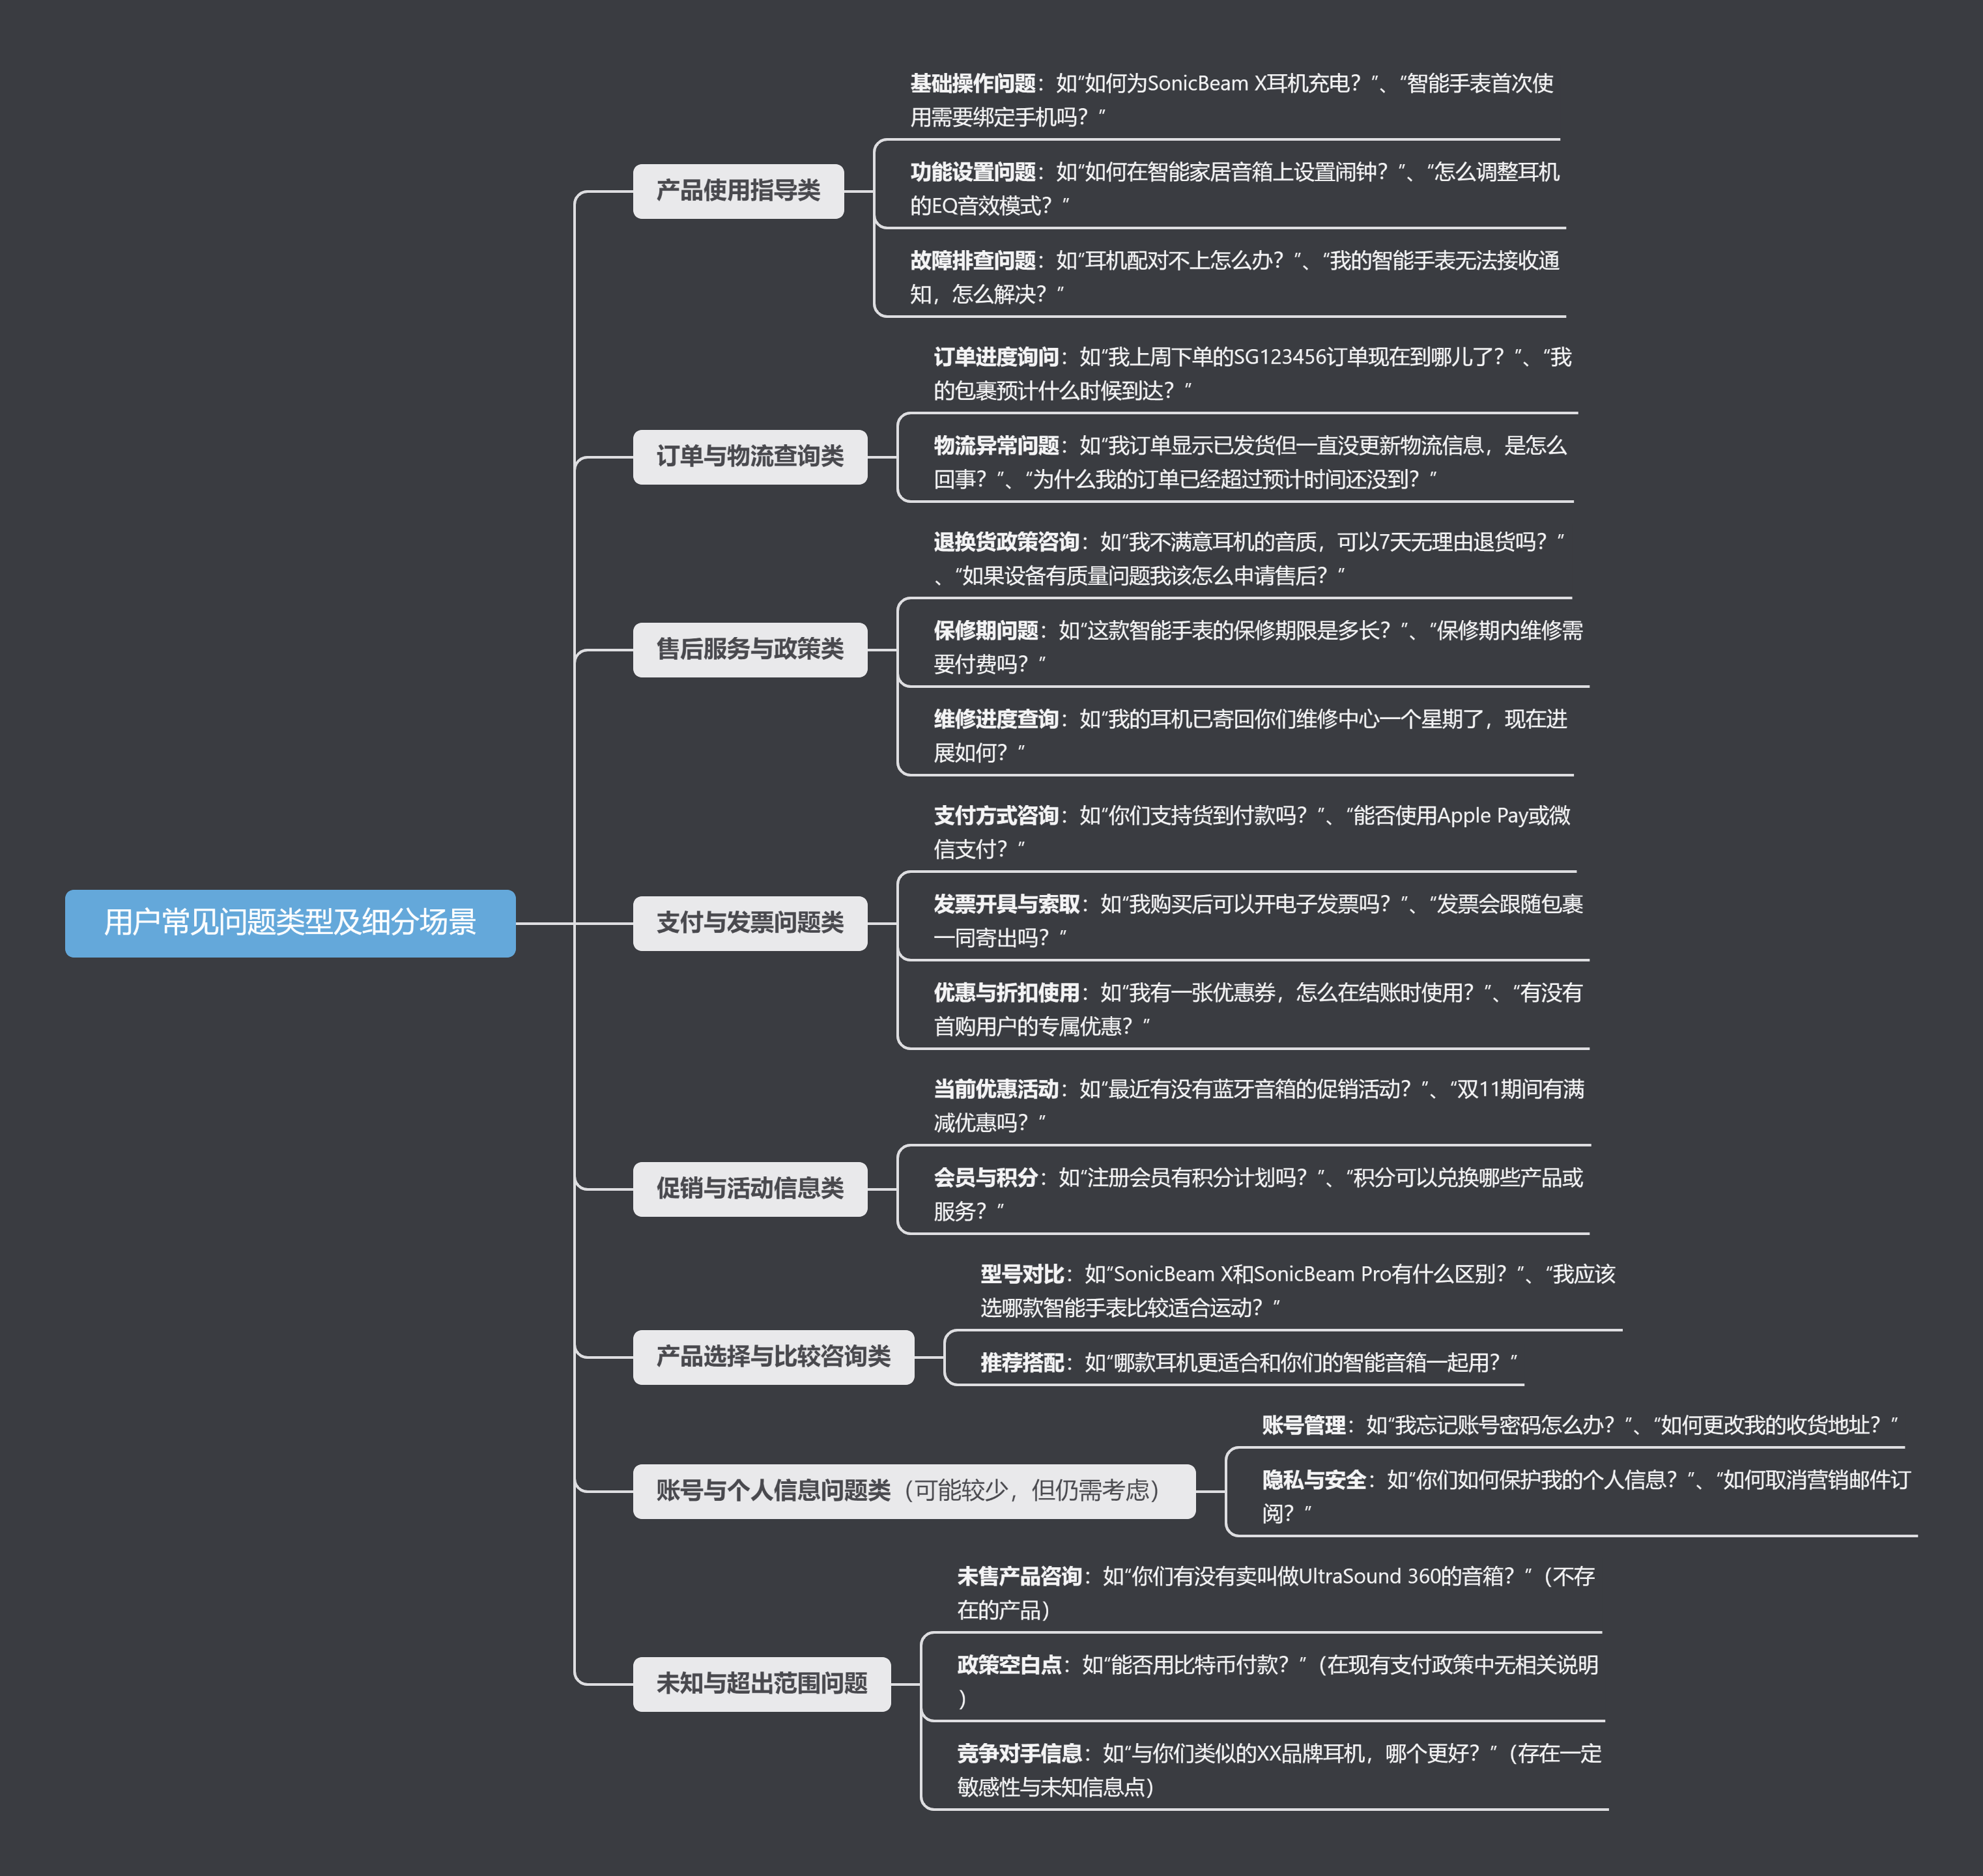
Руководство по началу работы с оперативным проектом (7) Практическое сочетание оперативного письма — оперативного письма на основе интеллектуальной системы вопросов и ответов службы поддержки клиентов

[docker] Версия сервера «Чтение 3» — создайте свою собственную программу чтения веб-текста

Обзор Cloud-init и этапы создания в рамках PVE

Корпоративные пользователи используют пакет регистрационных ресурсов для регистрации ICP для веб-сайта и активации оплаты WeChat H5 (с кодом платежного узла версии API V3)
Подробное объяснение таких показателей производительности с высоким уровнем параллелизма, как QPS, TPS, RT и пропускная способность.
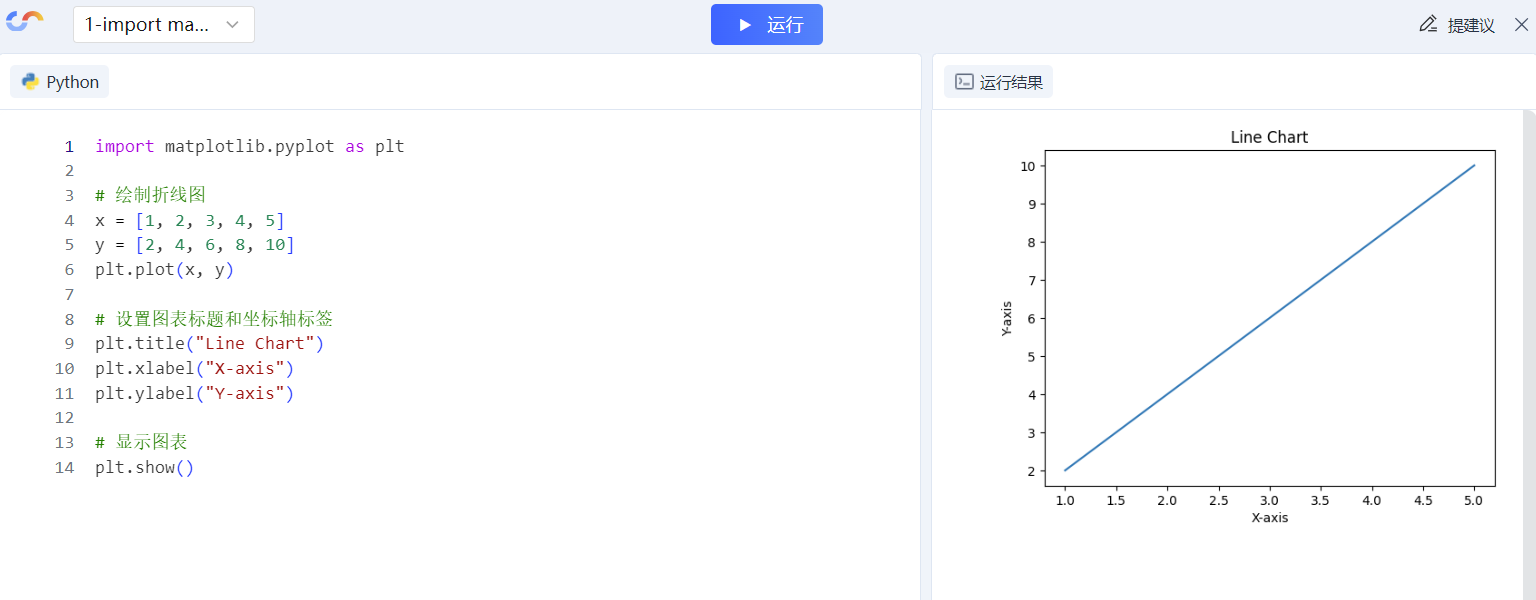
Удачи в конкурсе Python Essay Challenge, станьте первым, кто испытает новую функцию сообщества [Запускать блоки кода онлайн] и выиграйте множество изысканных подарков!

[Техническая посадка травы] Кровавая рвота и отделка позволяют вам необычным образом ощипывать гусиные перья! Не распространяйте информацию! ! !

[Официальное ограниченное по времени мероприятие] Сейчас ноябрь, напишите и получите приз

Прочтите это в одной статье: Учебник для няни по созданию сервера Huanshou Parlu на базе CVM-сервера.
Cloud Native | Что такое CRD (настраиваемые определения ресурсов) в K8s?

Как использовать Cloudflare CDN для настройки узла (CF самостоятельно выбирает IP) Гонконг, Китай/Азия узел/сводка и рекомендации внутреннего высокоскоростного IP-сегмента

Дополнительные правила вознаграждения амбассадоров акции в марте 2023 г.

Можно ли открыть частный сервер Phantom Beast Palu одним щелчком мыши? Супер простой урок для начинающих! (Прилагается метод обновления сервера)
[Играйте с Phantom Beast Palu] Обновите игровой сервер Phantom Beast Pallu одним щелчком мыши
Maotouhu делится: последний доступный внутри страны адрес склада исходного образа Docker 2024 года (обновлено 1 декабря)

Кодирование Base64 в MultipartFile

5 точек расширения SpringBoot, супер практично!

Глубокое понимание сопоставления индексов Elasticsearch.


